
Projects
My first AI-designed 3D print
Using AI to take a wheel-lock key case from a rough concept to a physical prototype, with a few hinge problems and some unwanted spider webs along the way.
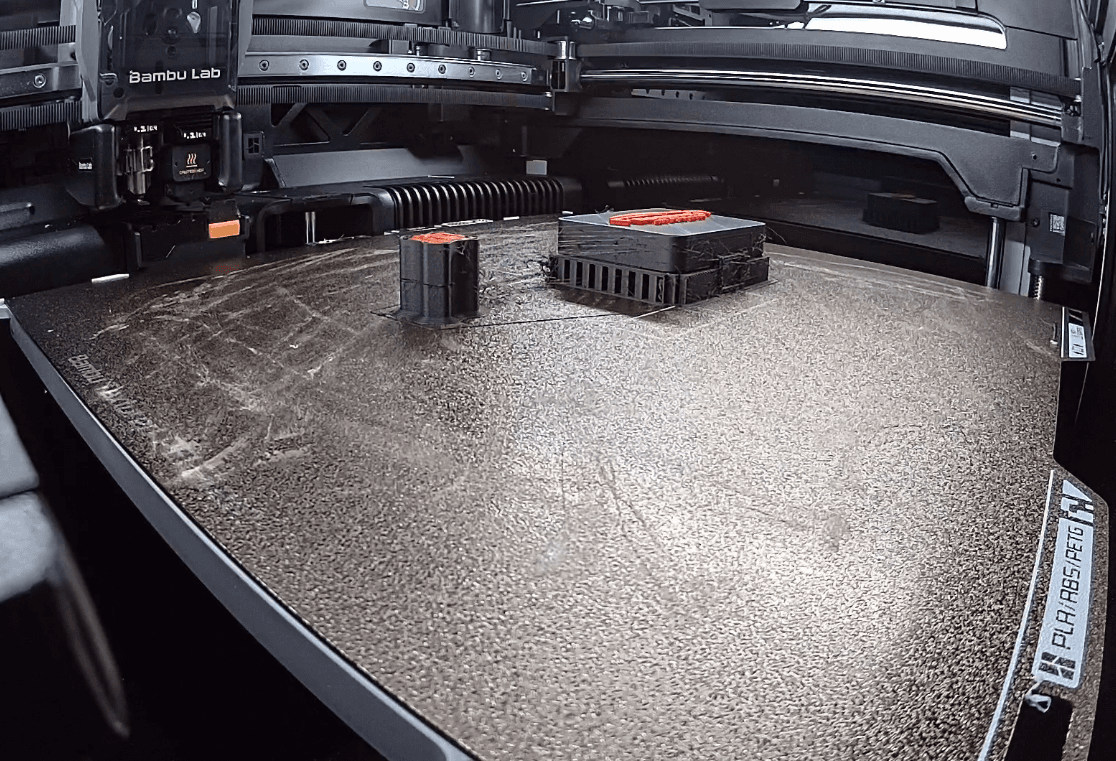
I've been experimenting with using AI to design something I can actually 3D print. For my first attempt at taking a project from AI-generated concepts through AI-assisted CAD, I picked a small case for a vehicle's wheel-lock key.
The idea is pretty simple: an automotive repair shop could put its logo on the case and give it to customers. The key, which is used to remove the vehicle's locking lug nuts, would have a place in the glovebox or center console. Something inexpensive, useful, and worth keeping.
So far, getting from that idea to a printable case has involved several revisions to what is, on the surface, a small plastic box.
I started with rough AI-generated product concepts and picked a low-profile clamshell design. From there, I used AI to help turn the concept into CAD files and work through revisions.
I eventually settled on a roughly 75 × 55 × 32 mm case, with a hinged lid, snap latch, and flat surface for a shop's logo. I'm aiming for one universal size, with an EVA foam insert to accommodate different wheel-lock keys, instead of maintaining separate case designs for different keys. That still needs fit testing, but it gives me a simpler starting point.
AI made it much faster to get a concept into a form I could start working with. It also made it easy to ask for changes as problems came up. The harder part has been figuring out whether those changes produce something that works once it's printed.
An early version had a hinge geometry problem: the hinge axes on the lid and base didn't properly line up. That's a fairly important detail for a hinge.
Working through revisions with AI, I corrected the alignment and changed the hinge to use a metal pin, with repeated opening and closing in mind. I've also strengthened and refined the snap latch and adjusted clearances for the eventual move to ABS. The latch needs to hold the case closed while still letting someone open it without a fight. Whether it keeps doing that after repeated use is one of the things I'm testing.
I'm printing the prototypes in PLA for now because it's cheaper and easier to work with during these iterations. ABS is the plan for the final version. The PLA prints let me check the design as I go, but there's still another round of testing ahead when I change materials.
The branding has become its own experiment. I've been working with SVG logos in Bambu Studio and trying multicolor printing. I want the logo to sit flush with the top of the case, so getting it onto the surface is only part of the job. Getting it to print cleanly as part of that surface is the goal.
Ideally, I'd keep the same base CAD model and customize the logo in Bambu Studio for each shop. That would make it much easier to reuse the design without revisiting the CAD files every time. I'm still working through the logo application process, so I wouldn't call that a finished workflow yet.
The latest issue is noticeable stringing on the PLA prototypes: thin strands of filament that look like little spider webs. Those were not in the product concept.
I haven't pinned down the cause yet. Filament moisture, print temperature, calibration, and the geometry itself are on the list for the next round of troubleshooting.
That's where the project stands: physical prototypes, several design revisions, and a list of things to check. Print quality, key fit, hinge and latch durability, and the flush logo all need more work. I'm also looking for inexpensive EVA foam inserts, since the case and its contents need to make sense together, including the cost.
I've liked having a reason to work through these details with the printer. AI has sped up the concept and CAD work considerably, but each physical version gives me something else to inspect, adjust, or troubleshoot. Next up is getting the PLA prints cleaner and testing how the revised hinge and latch hold up.